
If you ship daily from WooCommerce, your biggest risk isn’t labels — it’s missed orders.
A busy store can easily end up with “Processing” orders spread across multiple days, shipping methods, and priorities. The result: someone on your team asks, “What should I ship next?”… and you’re back to clicking filters and scrolling.
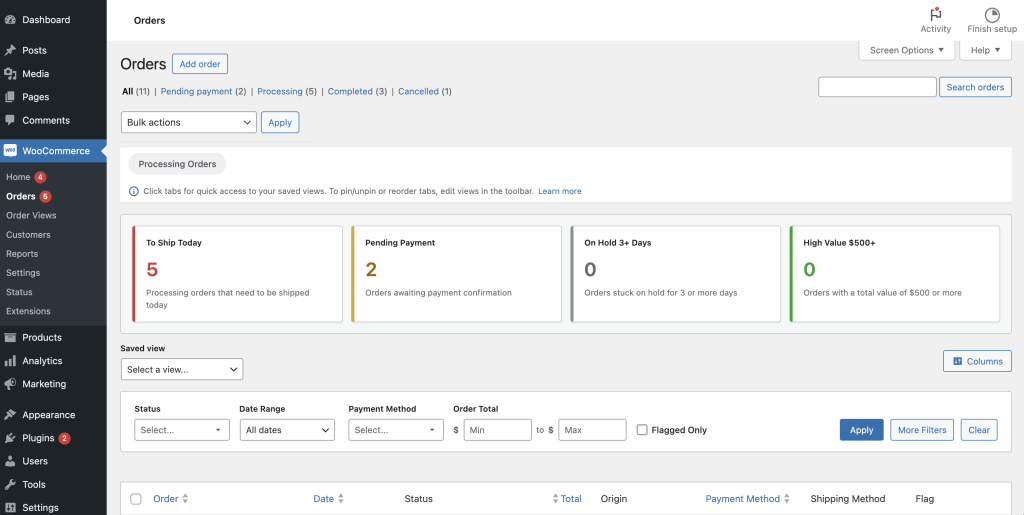
In this guide, you’ll build a “To ship today” queue that’s always one click away inside WooCommerce → Orders.
Step 1: Decide what “To ship today” means for your store
Most stores use one of these definitions:
- Processing orders created today
- Processing orders created today + yesterday (great if you pick/pack in batches)
- Processing orders for a specific carrier (e.g., “DHL Express” days)
Write down your definition first. Your view will match it.
Step 2: Apply the filters on WooCommerce → Orders
Go to WooCommerce → Orders and apply:
- Status:
Processing - Date preset:
Today(or your preferred range) - (Optional) Shipping method: select your carrier/service
- (Optional) Country: if you ship by region
The key is that your filters should represent a true fulfillment queue: paid/unfulfilled orders you can actually ship now.
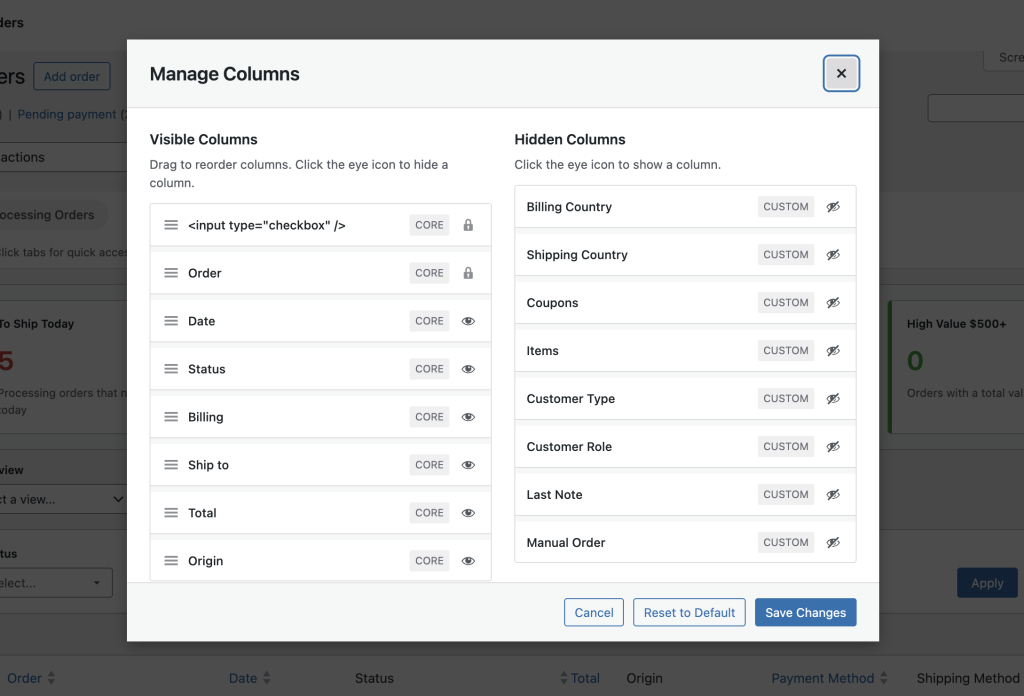
Step 3: Show the columns your warehouse needs (not what WooCommerce defaults to)
A fulfillment queue is only useful if the table shows the “decision data” at a glance.
Recommended columns for shipping:
- Shipping method (to batch labels)
- Items / SKUs summary (so pick/pack is faster)
- Shipping country (for international batching)
- Payment method (optional: helps spot COD/manual payments)
Step 4: Sort oldest-first to prevent “stuck” orders
Sort by Order date ascending (oldest at top).
This single step prevents the most common fulfillment failure: new orders pushing older ones down.
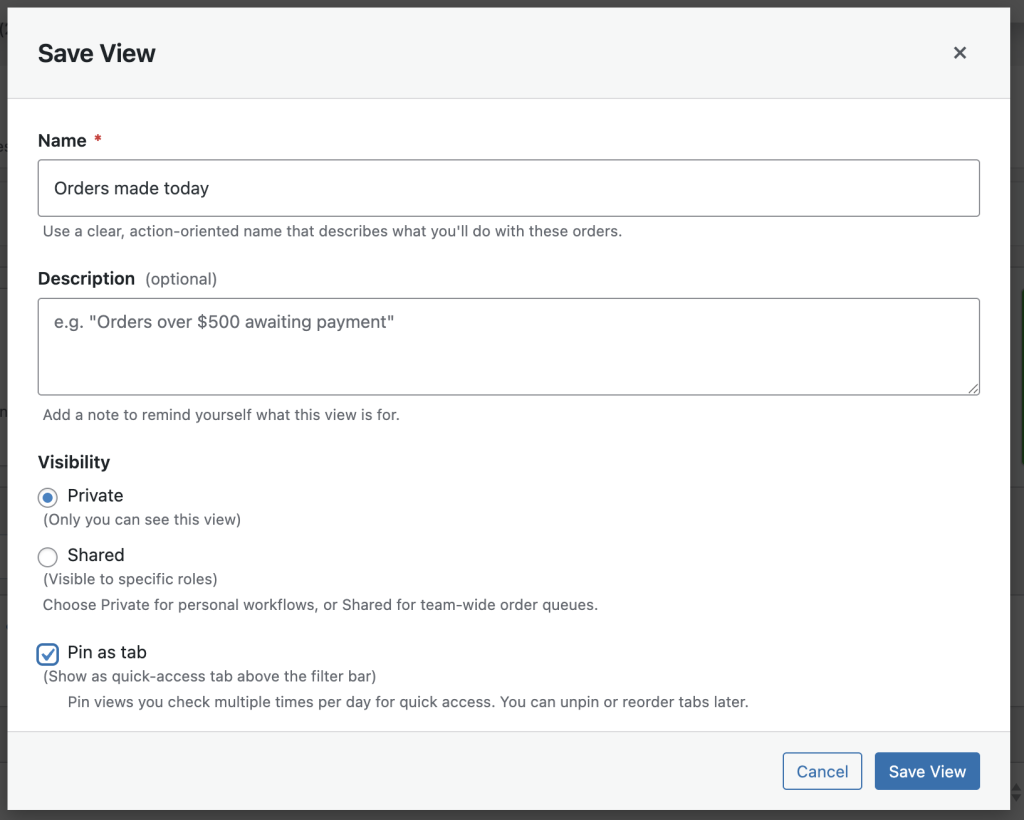
Step 5: Save the configuration as a reusable View (your daily queue)
Now save your setup as a view:
- Name: To ship today
- Scope: choose shared if multiple staff need it
- Pin as tab: yes
This matters because your view becomes a “named queue” that remembers:
- your filters
- your selected columns
- your sorting
- items-per-page
So tomorrow, your team clicks one tab and they’re back in the exact same workflow.
Step 6 (optional): Make it a KPI tile with a live count
If you’re using KPI tiles, enable a tile for To ship today so the top of Orders becomes a quick dashboard:
- “To ship today (23)”
- click the tile → jumps to the view instantly
This is especially useful for ops managers who want a quick “what’s the load today?” snapshot.
Step 7 (optional): Make it the default view for Fulfillment roles
If you have a fulfillment/warehouse role (or you use Shop Worker / Shop Manager roles), set the default so staff land on the queue automatically when they open Orders.
That’s how you eliminate the daily “where do I start?” question.
Common variations you can add later
Once your first queue works, create a couple more:
- Late orders: On-hold/Processing older than N days
- Carrier batching: “UPS Ground today”, “DHL Express today”
- Country batching: “International today”
CTA
If you want this workflow built directly into WooCommerce → Orders with saved views, pinned tabs, role defaults, and KPI tiles, try Order Views.